|
Advanced
Authoring
A lot of people
have TONS of SVCDs laying around they would like to put on DVD.
Fortunately, DVD-Lab will allow this with one caveat .. you must
transcode the audio from 44,000 to 48,000. DVD-Lab has a built in
transcoder, but its twitchy ... sometimes it works, sometimes it
doesn't.
This tutorial
will show you how to use BeSweet (and its GUI) to transcode your
audio.
Transcoding
Your Audio
Step
1: Demux the File
Software Needed:
- Various
Summary: Get a .MPA file from your original
- Use
DVD-Lab or other software to split your video into stand alone
video and audio files. When you attempt to load your
SVCD into DVD-Lab, it will offer to demultiplex it. Allow it to
do so. You will get a resultant .MPA file. This is the audio file.
Step
2: Setting Up BeSweet
Software Needed:
- BeSweet (Free: Download
| Visit Homepage)
- BeSweet GUI (Free:
Download | Visit
Homepage)
Summary: Set up BeSweet to convert your
MPA to WAV
- Download
and unpack BeSweet.
- Download
and unpack BeSweet GUI.
- Run
BeSweet GUI. It
looks daunting, doesn't it? Not too bad .. just bear with me.
- Point
the GUI to the besweet.exe file. At the top, there is
a place to point the program to the BeSweet executable.

- Select
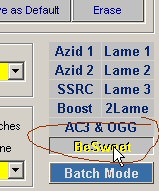
BESWEET from the profiles on the right. This will put
the GUI in BeSweet mode.

- Configure
the GUI to convert the file. Change your settings to
match these:

Step
3: Converting Your Audio
Software Needed:
-
BeSweet (Free: Download
| Visit Homepage)
- BeSweet GUI (Free:
Download | Visit
Homepage)
Summary: Use BeSweet to convert the audio.
- Select
your input and output files. Using the GUI, select the
INPUT file (your recently split MPA file), and select the OUTPUT
WAV file.

- Click
the MPA to WAV button. It will convert your audio!

A DOS box will appear (BeSweet is a DOS program) and it will convert
your audio. This can take some time if your file is big.
Once done, you are ready to import the video and the new .WAV
file into your DVD-Lab or your DVD authoring program.
|


